Properly executed, grilled pizzas will make you a hero of your next backyard barbecue or grilling party. Follow our steps below to create an exceptional dough that cooperates with you while being grilled.
FOR THE DOUGH:
- 3 cups all purpose flour (plus extra for kneading and rolling)
- 1 tablespoon honey
- 1/2 teaspoon instant, or rapid rise yeast
- 1 1/4 cups room temperature water
- 1 1/2 teaspoons salt
- 1 tablespoon Olive oil
FOR THE SAUCE:
These pizzas cook quickly on the grill and develop a thin, crispy, flatbread-style crust. You’re already going to the trouble of making a dough, so don’t feel the need to stress out with a homemade sauce. We created a simple garlic oil sauce, but also used our favorite jarred marinara.
GET CHEFFY TIP!– If you’re in the mood to make our Get Cheffy garlic oil, place 4 tablespoons olive in a small saute pan, over medium/low heat. While the oil heats, add 1-2 teaspoons of minced garlic, 1 teaspoon dried oregano, 1 teaspoon ground black pepper, 1/2 teaspoon salt, 1 teaspoon crushed red pepper flakes, and 1 teaspoon anchovy paste. Allow the oil to heat and, once you’ve reached a sizzle, turn your heat to low, and allow to cook for another 1-2 minutes (watch your minced garlic to ensure it doesn’t burn). Once your minced garlic has achieved a pale golden brown color, turn off your heat, and pour your oil into a small bowl to cool. Set aside until ready to grill.
FOR THE TOPPINGS:
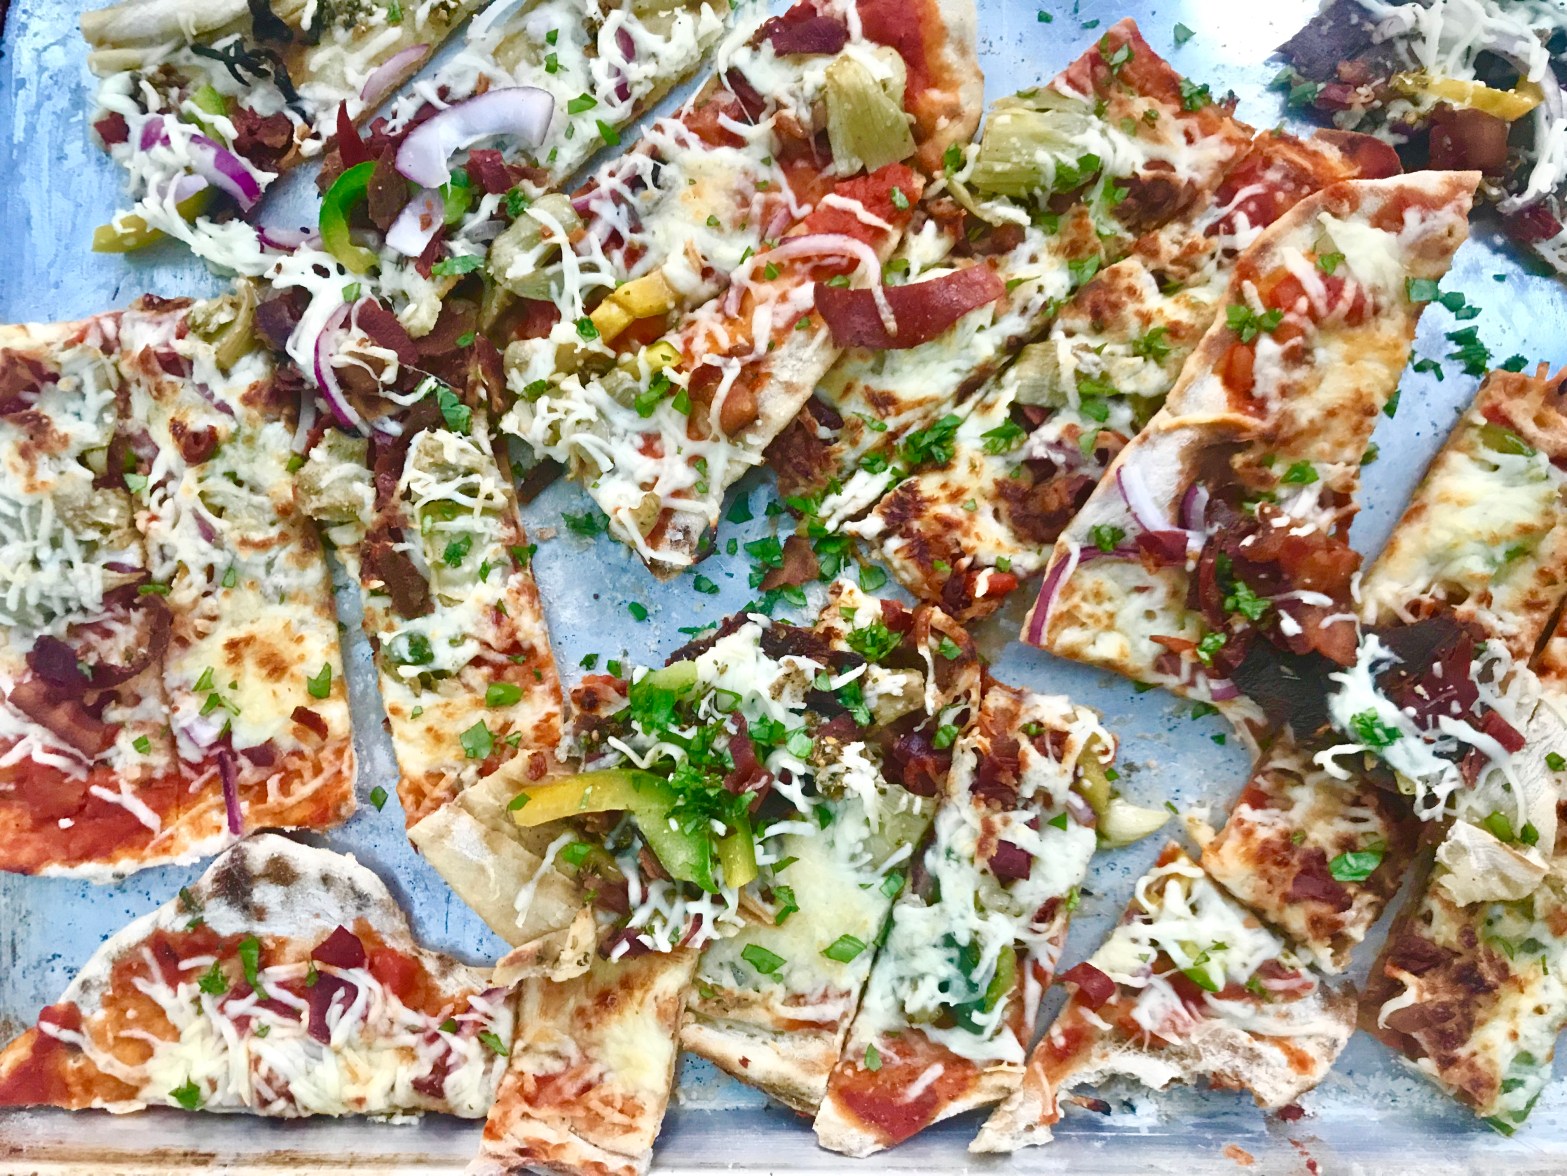
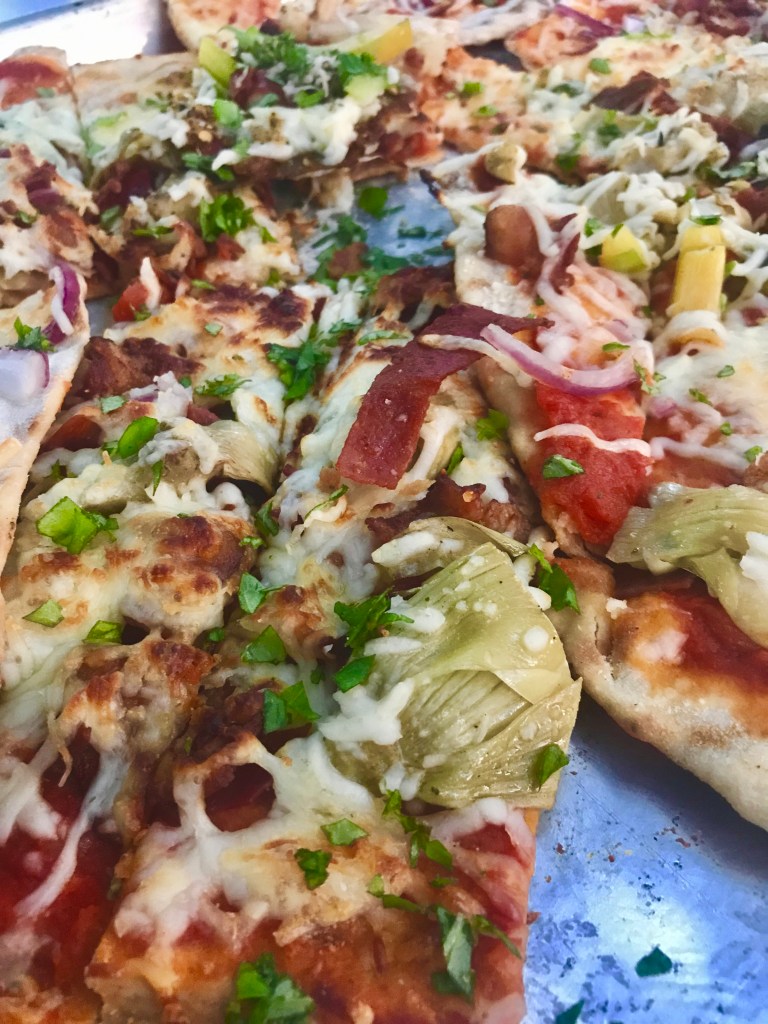
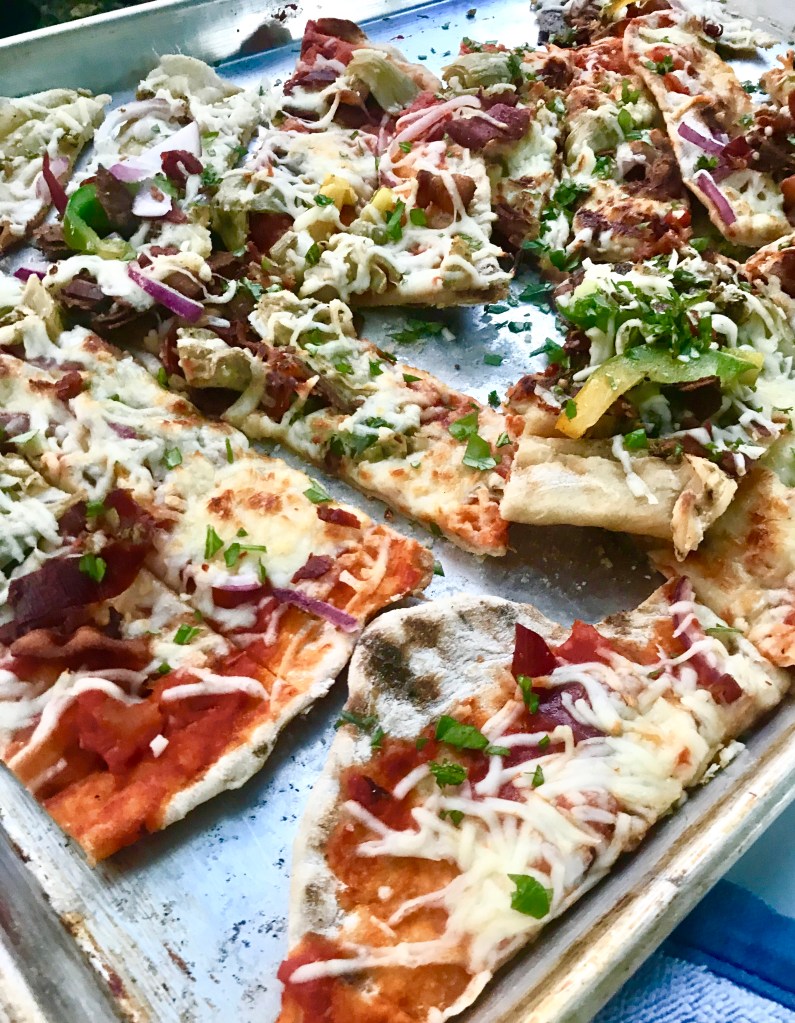
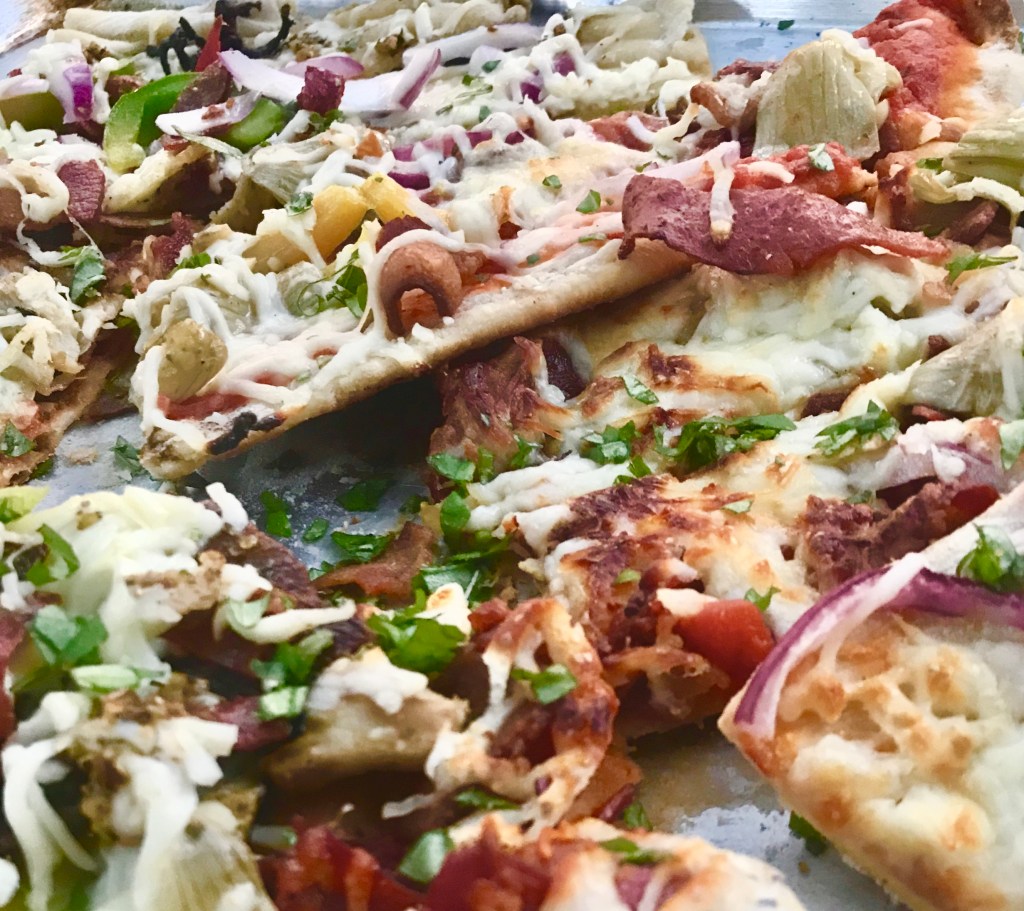
Similar to the sauce “instructions” above, we aren’t going to tell you how to live your life when it comes to pizza. Our Get Cheffy grilled pizzas were topped with a combination of artichokes, green peppers, red onions, cooked bacon, and prosciutto and finely minced basil (put on after the bake). This is your time to open up your fridge, pull out anything that looks even remotely “pizza topping-ish”, and Get Cheffy!!! Some recommendations below:
- Meat Toppings– The pizzas themselves don’t stay on the grill long enough to fully cook any meat/poultry. Therefore, if using any meat toppings, pre-cook your meats, and set them aside in a bowl before lighting your grill.
- Veg Toppings– We used jarred artichokes, green peppers, and red onions. The artichokes are ready to go straight out of the jar (we broke them apart a little bit with our fingers), but the green peppers and onions needed a quick “blitz” in the microwave to soften them a bit. If using raw, “hearty vegetables” like these, slice into thin trips, and place into a microwave safe bowl; heat in the microwave for 1 minute before stirring and heating a second time, for an additional 1 minute.
- Cheese Toppings– We used shredded mozzarella, but parmesan, fontina, provolone, cheddar or any other cheese would work well here. Generally, the firmer the cheese, the finer you’ll want to grind it. Softer cheeses, like mozzarella, melt quickly.
- Begin by making your dough. In a standing mixer fitted with a dough hook, combine your water, honey, and yeast. Stir to combine. Add your 3 cups of all purpose flour, and turn your mixer on low. Allow the dough to come together to form a sticky ball (about 5 minutes). After 5 minutes, pause your machine, and scrape down the sides with an oiled spatula. Add your teaspoon of salt, and turn the machine back on, now at medium speed. Allow to run for another 5 minutes. Pause the machine a final time, and scrape down the bowl, and dough hook a final time (if needed). Turn your mixer back on medium setting, and allow to knead your dough for a final 5 minutes (15 minutes total).
- You may do all of this by hand, but you’ll need extra flour to ensure your dough doesn’t stick to your board. Don’t be shy with the flour; it’ll save your life here.
- Once your dough is kneaded, cover your mixing bowl tightly with plastic wrap, and foil, and place into your fridge to relax, and chill for 24 hours.
- When ready to grill, take your dough out of the fridge, and allow to sit on the counter at room temperature for at least 1 hour. Light your grill after your dough has warmed up on the counter for 1 hour.
- Once your dough has rested on the counter for 1 hour, flour your counter/board and dump the dough out. Using a floured knife, or bench scraper, divide the dough into thirds. Using a rolling pin, begin to roll out your first crust into a rough 11 inch circle (again, don’t be shy with the flour, keep flouring your board, rolling pin, and dough to prevent sticking).
- Once your first crust is a rough 11 inch circle, roll the dough onto your pin, and transfer/unravel onto a sheet tray lined with parchment paper that’s been sprayed with cooking spray. Cover your first crust with another layer of oiled parchment, and repeat with the second, and third, dough balls until you’ve rolled out three crusts. Ensure you separate each crust with a layer of oiled parchment to prevent sticking. Cover your crusts with a kitchen towel while you light your grill.
- FOR A CHARCOAL GRILL:
- Light a full charcoal chimney. After about 15-20 minutes, you’ll begin to see light, gray ash appearing along the edges of your coals. Dump your coals into an even ring around your pit; do not bank your coals onto one side. Using your grilling tools, ensure that the center of the grill is clear of any coals. You want a perimeter of charcoal around your entire grill edge with no coals in the center.
- FOR A GAS GRILL:
- Turn all burners of your gas grill on high, and close the lid. Allow your grill to heat up, 5-10 minutes, before opening the lid, and scraping down the grates. Once your grill grates are clean, turn off one side of your burners completely and reduce the heat of your second side to medium/high.
- FOR A CHARCOAL GRILL:
- When you’re ready to put your doughs onto your grill, clean and oil your grates thoroughly. Take your first crust and, using your hands, tongs, or spatula slide the crust off the parchment, and directly into the center of the grill. NOTE* This can be tricky to get right your first time; a more fool-proof method is to roll your dough onto your rolling pin, and then unravel, slowly and carefully, back onto your grill grates. Try both methods!
- Once your dough is on your grill, cover your grill with its lid, and open the top vents fully. Allow the dough to cook for 2-3 minutes. After 2-3 minutes, open the lid and, using tongs, and a large spatula, take a peek at the underside of your crust. You should see some beautiful grill marks forming. Flip the crust to the other side, and re-cover your grill with the lid vents fully open. Allow to cook for another 1-2 minutes (you are intentionally undercooking this 2nd side).
- After 1-2 minutes on its second side, slide your crust off the grill onto a prepared sheet tray or cutting board, cover with a towel, and repeat the steps with your other two crusts.
- Once all crusts are baked, take the 1st crust you grilled (it should be fully cooled) and find the pale/blonde side that was intentionally under cooked. Brush this side with vegetable oil, and place the crust back onto the grill, with the oil side facing down. Sauce the top of your crust with the back of a spoon, or a brush, and quickly and carefully add any meats, veg; finish with any cheese(s). Cover your grill with its lid vents fully opened, and allow to cook for another 2-3 minutes, or until the cheese is melted. Once your cheese has melted, pull the pizza off the grill, and back onto a cutting board and repeat with the other two crusts. Top with minced basil, slice and serve.
- It’s best to have all of your toppings (meats, veg, cheese, sauce) all fully prepared and ready to go in bowls. Once you start grilling, you won’t have much opportunity to open that jar of marinara, chop those onions, or cook any sausage or bacon that you intend to put onto your pizza.

One thought on “Pizza on the Grill”