Chili is warm, comforting, and a perfect dish to serve when cold weather is here. However for being such a humble dish of vegetables, meat, and spices, chili has a surprising groups of followers, and aficionados, who take it seriously. Purists hotly debate whether or not the dish should contain beans (our Get Cheffy Chili does), and what type of seasoning can, and should, be used.
In general, ground beef chili gets less respect in the culinary world than Chili that uses slow roast beef chuck, or rump roast, as its protein. We, however, turn to prepackaged ground beef for its convenience and availability. We balance this with a substantial vegetable backbone that lays the foundation before adding freshly pureed tomatoes to finish the dish (easily turn our Get Cheffy Chili vegetarian, or vegan, by omitting the beef and cheeses).
FOR THE BASE:
- 4 Tablespoons Butter
- 8 Medium Yellow or White Onions
- 6 Bell Peppers
- 1 Tablespoon Fresh Black Pepper
- 1-2 Teaspoons Table Salt
- 1 Tablespoon Minced Garlic
- 2 Tablespoons Tomato Paste
- 1 Tablespoon Sriracha Style Hot Sauce (Optional)
- 1/2 Teaspoon Red Pepper Flakes (Optional)
- 1 Tablespoon Soy Sauce
- 1 Tablespoon Worcestershire
- 1 Teaspoon Brown Sugar
- 2 Tablespoons Sherry Wine Vinegar
- 1 Tablespoon Apple Cider Vinegar
FOR THE SPICE MIXTURE:
- 2 Tablespoons Chili Powder
- 2 Tablespoon Onion Powder
- 1 Tablespoon Garlic Powder
- 1 Tablespoon Paprika
- 1 Teaspoon Salt
- 1 Tablespoon Cumin
- 1 Tablespoon Dried Chives
- 1 Tablespoon Dried Parsley
FOR THE BEEF & TOMATOES:
- 2 Pounds Ground Beef (between 80/20 or 70/30 fat ratio)
- 2 28oz Cans of Whole Plum Tomatoes (we use Hunt’s)
- 2 Teaspoons Worcestershire (to finish)
- 2 Teaspoons Apple Cider Vinegar (to finish)
- 2 15oz Cans of Black Beans (with their canning liquid)
- 4 oz (1/4 pound) American Cheese (optional)
Get Cheffy Chili Con Carne 
Get Cheffy Chili Con Carne
- Begin by breaking down your vegetables. We use our food processor for this as it makes very short work of your vegetables. If you don’t have a food processor, you can grate the vegetables on the large holes of a box grater, or chop them finely by hand. Heat your 4 tablespoons of butter over medium/low heat in a large dutch oven. While your butter melts, roughly chop your onions and, working in batches, pulse them in the food processor fitted with a steel blade. You’re looking for small, pea-sized pieces of onion (10-15 pulses), and you may need to scrape-down the food processor halfway through to ensure everything gets chopped evenly. Add each batch of pulsed onions to the stock pot after it’s processed. After you’ve added all of your onions to your stock pot, add 1 teaspoon of table salt, stir to combine, and get out of the room. The amount of onions, and the way they were pulverized in the food processor, has split open the cell walls of the onions and released a lot of the sulfuric compounds that will make your eyes tear up. The sulfur compounds will clear from the air after 10-15 minutes, but you may need to rinse some cool water over your face. After 10-15 minutes over medium/low heat, you should be good to get back into the kitchen. At this point, add your tomato paste, Sriracha hot sauce (if using), red pepper flakes (if using), soy sauce, Worcestershire sauce, fresh ground black pepper, apple cider, and sherry wine vinegars, minced garlic, and brown sugar. Stir to combine and continue to reduce and caramelize over medium/low heat stirring occasionally to ensure the bottom of the pot doesn’t burn (another 10-15 minutes); as with any dish you’re making, if you do notice too much browning occurring at the bottom of the pan, you can lower your heat, and deglaze with a few tablespoons of water or wine. After an additional 10-15 minutes (20-30 minutes total), taste your onion mixture. It should be strongly seasoned and have a sweet, tangy bite to it. Take a moment here to adjust for additional salt, hot sauce, vinegar, soy, brown sugar, etc……this is where you’ll Get Cheffy and “dial-up/dial-down” the flavor profiles that you like best (you Cheffy little thing). As always, if/when you add any additional flavorings, allow them to get to know the rest of their friends in the stock pot by allowing them 2-4 minutes to cook together before you re-taste and re-adjust. Once your onion base is seasoned in a way that you like, take your 6 bell peppers, and pulse them in the food processor in the same manner you chopped up your onions (10-15 pulses…..small, pea-sized pieces). Add your chopped peppers to the pot, and stir to combine. The salt in the onions will react with the cut edges of the peppers, and you’ll notice liquid from the peppers in the bottom of your pot. Use this liquid to scrape up, and deglaze any color and flavor that’s built up in the bottom of your pot, and continue to cook, over low-medium/low heat for another 10-15 minutes.
- While your vegetables continue to simmer and reduce together, combine all dried spices from the spice mixture in a bowl, and add your ground beef to a large non-stick pan set over high heat (you shouldn’t need any oil or fat in the pan). Break up the ground beef into large chunks, and allow these pieces to sear and cook over high heat for 4-6 minutes. You’re attempting to brown the beef aggressively here to impart as much flavor as you can into it before adding your spice mixture. Drain your beef, and continue to sear over high heat as you continue to break up the larger chunks into smaller and smaller pieces for another 4-6 minutes (8-12 minutes total). Once fully cooked, if necessary, drain your beef again to ensure you’ve eliminated most of the fat from the pan, and turn your heat to low before adding all of your dried spices to the beef. Stir to combine and coat your beef with the dried spice mixture and continue to cook over low heat for another 2-4 minutes. All dried spices need to “bloom” in a warm fat of some kind (butter/oil, etc.) to get their full flavor activated. Taste your beef, and adjust for any additional seasoning you like before continuing.
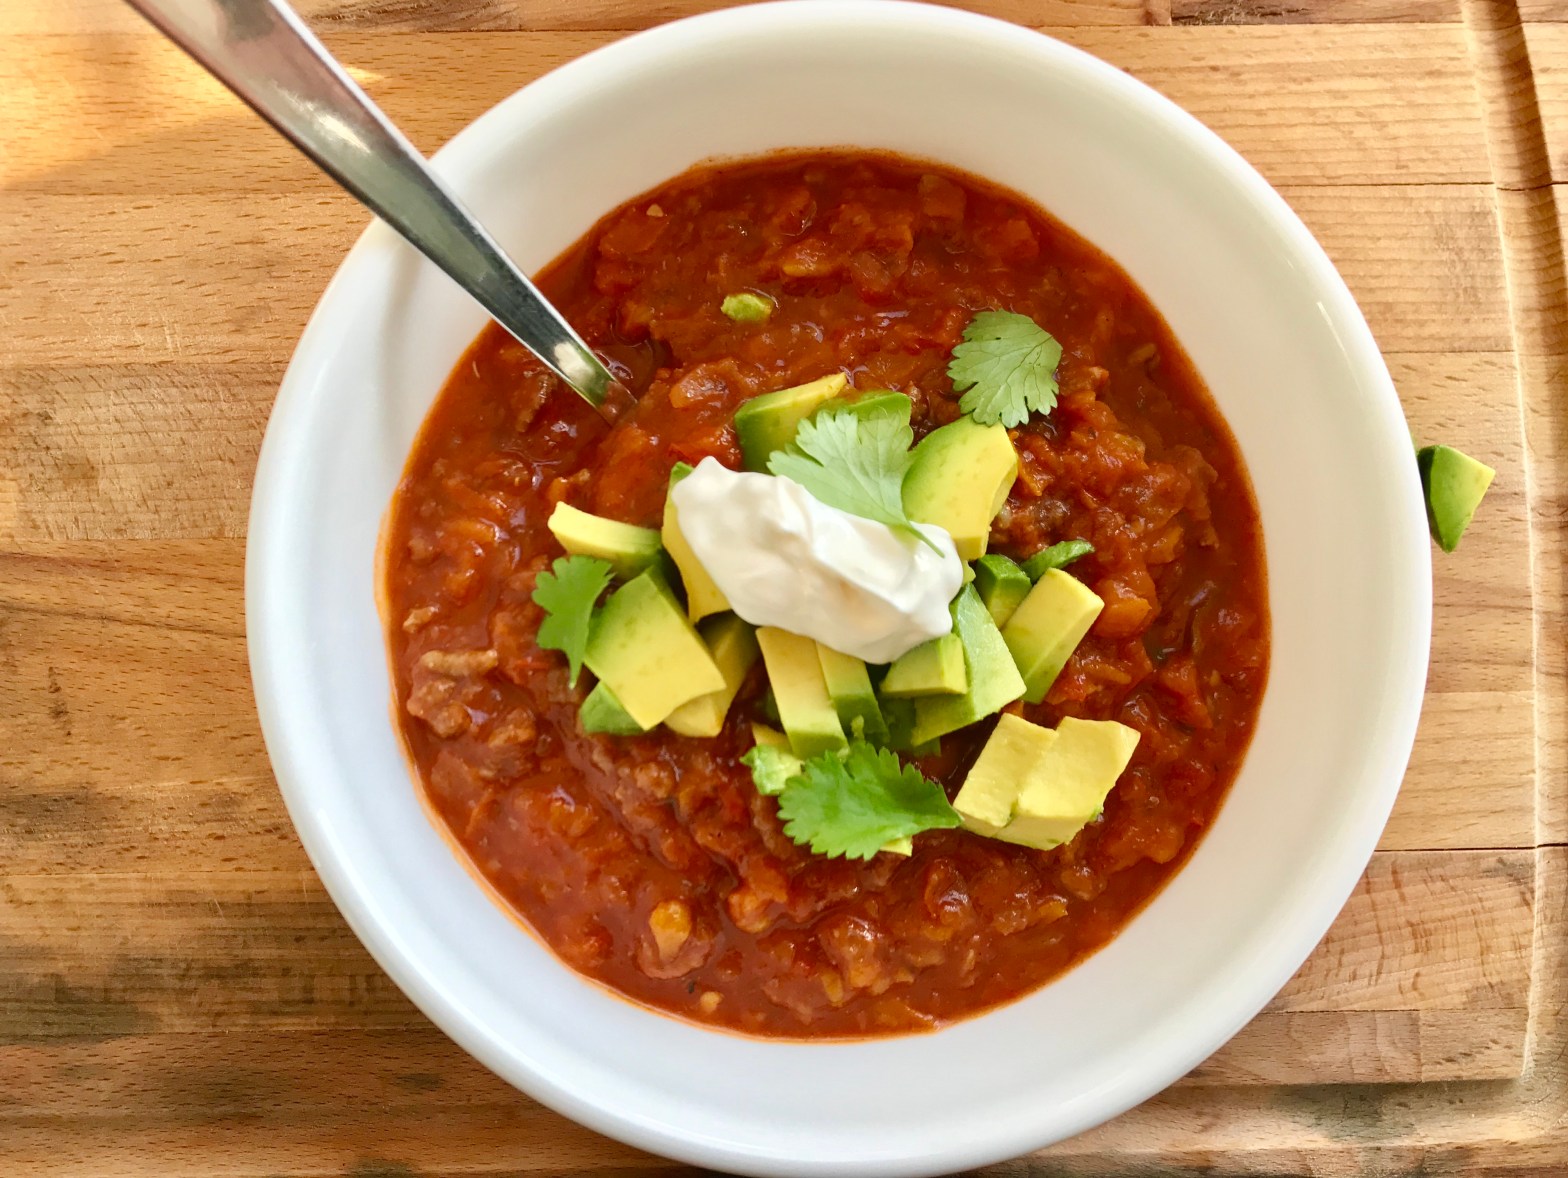
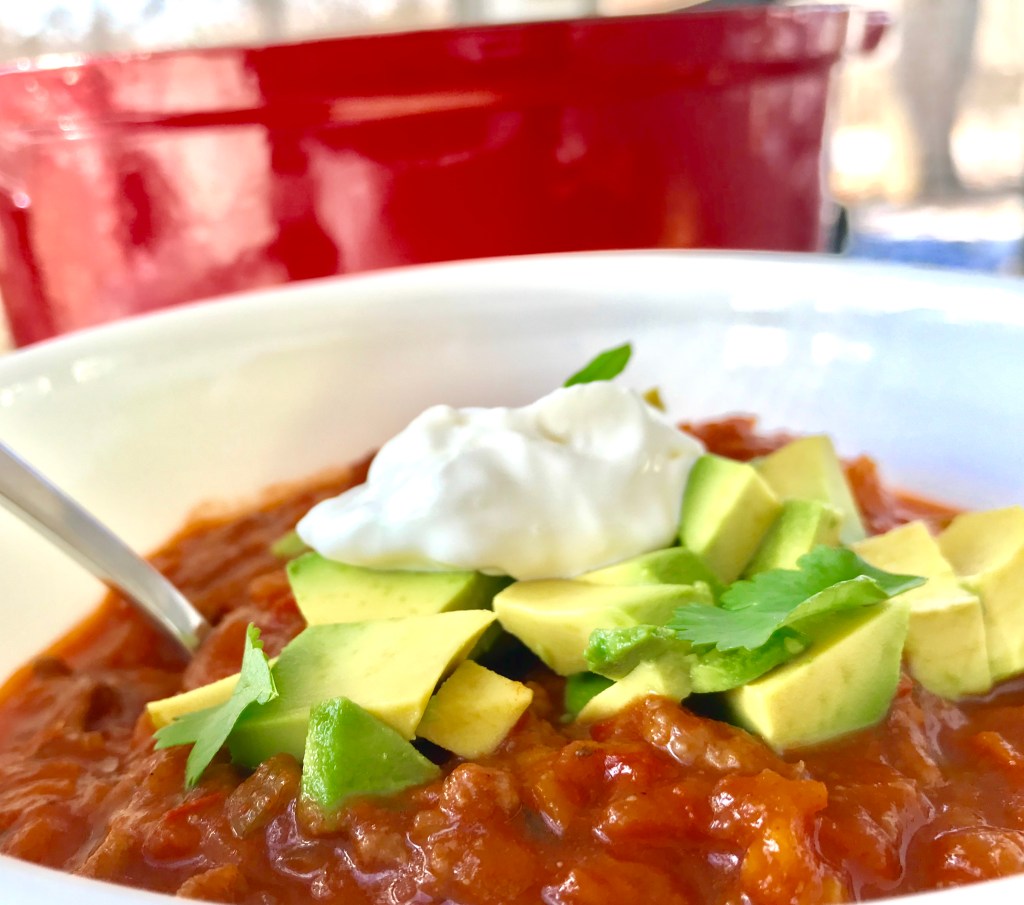
- Once your beef is cooked, combine the beef with the onion and pepper base in the large stock pot and stir to combine. Take your 2 cans of whole plum tomatoes and, working with one can at a time, add the tomatoes to your food processor to blitz into a puree (5-10 seconds). Add each batch of pureed tomatoes to your base after you’ve processed it. Add your two cans of black beans, with their canning liquid, to your pot, and stir to combine. Bringing the heat down the low, allow the tomatoes and beans to cook alongside the onions and beef for another 5 minutes. Taste your chili at this point. Add incremental amounts of vinegar, Worcestershire salt, brown sugar/honey, hot sauce, etc. to your chili to make any final adjustments. If using, gently break up the 4 oz of American Cheese, and allow to melt into the chili to add additional richness. Garish with additional cheese, sour cream, additional hot sauce, cilantro, diced avocado, etc., and serve.
